Friday, October 12, 2012

Creating a Sleep Schedule for Baby

My 6-week old is sleeping 8 hours straight at night! That's right! You heard it!
I am no "Baby Whisperer," nor am I a "Baby Coach." While I feel like I've achieved some victory over nighttime sleep, my son's daytime schedule is almost non-existent. I have, however, spent weeks researching the people who call themselves so, and I've compiled some helpful resources for you!

(Note: If you're going to start researching sleep training or schedule-making methods, keep in mind that even if you don't follow them to a T or if you find yourself "giving in" to what they advise against, sometimes just being aware of what they suggest will greatly help you and your baby's journey toward developing a schedule. You'll eventually find yourself implementing helpful strategies without realizing it! Knowledge is power!)

The first thing to know is that there are no right answers. Whatever strategies you choose will be right for you, your baby and your lifestyle.

There are (basically) three schools of thought about developing baby schedules. I found this information from Baby Center:
  1. There are "parent-led" schedules, in which baby eats, sleeps and plays according to the parents' schedule. "You'll sleep when I say you'll sleep."
  2. There are "baby-led" schedules, in which baby eats, sleeps and plays when the desire arises and baby will naturally develop a consistent schedule. "You'll sleep when you're tired."
  3. There are "combination" schedules which combine the "baby-led" and "parent-led" principles. "You'll generally sleep when I say so, but it's not written in stone."
Then you have different sleep training methods. The term "sleep training" is often helpful, as it reminds you that your baby needs to be taught bedtime routines and habits, that knowledge on how to "go to bed" is not innate.
  1. The "cry it out" method recommends that you lay baby down while he is still awake. Then, if he cries, you do not rush to him and sweep him up into your arms. Rather, you allow baby to cry for a short period of time, go in to reassure him with calming words and maybe some gentle patting or rubbing on the chest, and depart again, returning a short time later if baby is still crying. 
    1. This method, often associated with pediatrician Richard Ferber, is suggested to begin when baby is 4 to 6 months. (The above link for the cry it out method has step-by-step instructions on page 2 of the article.)
  2. The "no tears" method generally believes that allowing baby to cry is a betrayal of trust for your young one. Advocates suggest that you lay baby down early when he's showing signs of sleepiness. Then, if baby cries, comfort immediately by picking baby up and laying him back down when more calm. Some advocates recommend lulling baby to sleep by rocking him or use of co-sleeping.
    1. This method is often associated with Tracy Hogg (the "baby whisperer").
  3. There is a method that combines aspects of the methods above. The primary pediatrician associated with this method is Harvey Karp, creator of the "five S's," or, "the happiest baby" method. He recommends rocking baby to sleep or letting him fall asleep on your chest. Then, to prepare baby for falling asleep independently, you gently rouse baby before laying him in his crib. If baby cries, you apply Karp's "five S's" technique, which involves the following steps to recreate the experience in the womb (in this order):
    1. Swaddle baby. If that alone does not work,
    2. Side or Stomach - Place swaddled baby on his side or stomach (while still in your arms). If that doesn't work,
    3. Shhh - Make the shushing sound in baby's ear while still following the first two steps. If that doesn't work,
    4. Swing - Gently rock or make short swinging movements while still following the first three steps. If that doesn't work,
    5. Suck - Give baby a pacifier or your finger to suck on (sucking on a pacifier at night reduces the chances of SIDS)
All methods of sleep training recommend setting consistent baby schedules. To help me, I documented every nap and meal my son had from Week 2 on. (I'm still tracking every meal and nap. It's been really helpful in identifying sleep and eating patterns that my son was naturally developing on his own so I knew what consistent schedule to enforce.)

Before writing this post, I didn't think I subscribed the any method or school of thought. After this, however, I can say that I've subscribed to more of a "baby-led"schedule (I never would've guessed that's what I was doing!) and the "no tears" method. My husband finds a lot of success in the five S's method, which goes to show several methods can be used in one household.



Tuesday, August 28, 2012

Contractions and Labor: Myths and Tips

When my husband and I took our birthing class, we walked away with a knowledge base we thought would help us through the birthing process. As with many things in life, labor and deliver can only truly learned through trial by fire.

Here are some things we've learned since our labor process began:

Myth #1: Once contractions start, they'll progress consistently toward active labor. 
We thought that once your contractions start, you've got maybe 24 hours before baby arrives. I have now been in "inactive labor" for almost 72 hours. Inactive labor, for me, has consisted of:

  • contractions varying in length and severity, occurring anywhere from 3 minutes apart to 4 hours apart
  • lack of sleep due to contractions at night and frequent urination (once an hour)
  • nausea
  • heartburn
  • diarrhea/overactive digestive system
Many pregnancy websites state that once signs of labor begin, it can take up to weeks for delivery, but they don't really describe what that time in "limbo" can be like. Inactive labor is no picnic! After 24 hours of it, I was exhausted! I wanted to be induced, which is something I feel very strongly about (after having been induced almost immediately with my first child). I went to the hospital and learned that after 24 hours of constant discomfort and lack of sleep, I went from being dilated at 1cm to 1.5cm! As with so many anxious parents, we were sent home to continue our laboring at home.

Tip#1: If possible, treat your days of "inactive labor" like any other day. Don't get too excited with the onset of beginning contractions, you might be devastated to learn that you've still got days before delivery. If you notice your contractions aren't really stabilizing, or becoming consistent, or they aren't intensifying, don't waste your time on laboring activities! I spent hours walking, hoping it would stabilize the contractions. All it did was add to the swelling in my feet and make me exhausted. So today, I'm enjoying my time.

  • Eat
  • Rest
  • Relax
That's what I'll be doing until I notice that either my water breaks, I get my "bloody show," or my contractions start to noticeably intensify.

Myth #2: Contractions are easily measurable.
A coworker and I were recently discussing how hard it's been to measure the length of a contraction in early labor. Half of the time, I don't know if what I'm feeling is the beginning of a contraction or something else (like gas)! After having the honor of receiving them for almost 72 hours, I've been able to describe my contractions as such:

  1. a slight wave of nausea hits
  2. breathing becomes labored
  3. stomach muscles begin to tighten
  4. slight pain develops in back and gut at the peak
  5. gradual release of muscles and pain
Tip #2: Once you are able to identify that what you're experiencing is, indeed, a contraction, measure the first few to get your bearings. Don't worry if your measurements aren't exact and pay more attention to the time between contractions than the length of contractions (the latter is much more difficult to measure in the beginning). Don't be surprised if what starts off as an hour or more of consistent contractions (one contraction every 10 minutes, for example) suddenly gets inconsistent. Just when I thought mine were stabilizing at 7 minutes apart for an hour, I wouldn't get one for 30 minutes. Then, I'd have one 12 minutes later, then 5 minutes later, then 24 minutes later... it was frustrating! After measuring for more that 48 hours (and not focusing on much else), I'd had it! Trust your body. When your labor becomes more active, you'll notice it, even if you're not specifically focusing on it.

I'm still in the "inactive" section of my labor, so I'll have to add more as we experience it...


Thursday, August 16, 2012

DIY Floral Decor from Green Wedding Shoes

For our wedding, my sister and I made little flowers from sheet music. I loved them, but they looked tiny on the huge redwood we got married under.


These DIY giant flowers would've been amazing! 

Really, poster board and a bath poof never looked so good...


DIY Split-Tone Bridesmaid Shoes from Green Wedding Shoes

I'm planning on doing this ANYWAY, but it's a great idea for bridesmaids!! Click here for step-by-step instructions!!

Your materials...

Your awesome new shoes! 


DIY Ornament Favors for Holiday Wedding from Green Wedding Shoes

Getting married around December? Consider this DIY project for decorations or wedding favors!
Have kids? Consider making one of these each year for the kiddos!!!

Your materials... (Instead of using that squared applicator, you can use any tool with a straight edge. You can also use a hair dryer instead of the Zap. Just be easy on the heat!)


Your awesome favors!

Seriously, I have to do this for Christmas this year for the babes!


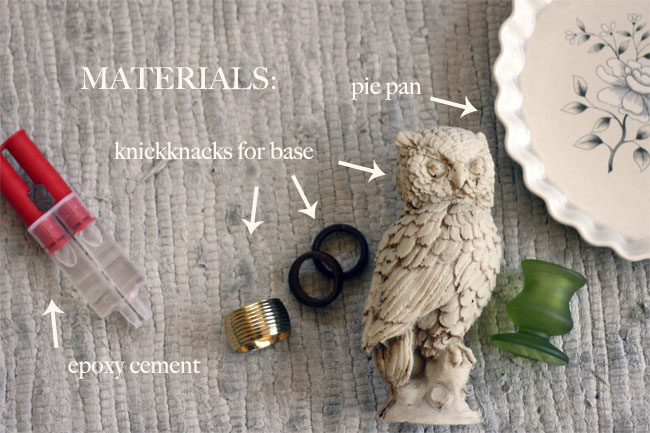
DIY Cake Stand from Green Wedding Shoes!

Oh, goodness! Where was this post a year ago!!!! Green Wedding Shoes features an awesome DIY post showing you how to make your own cake stand!!! Click on the link for step-by-step instructions!!!

Your materials

Your awesome cake stand! 

Really, that can't be any easier!


Tuesday, August 7, 2012

Unique Wedding Inspiration from 100 Layer Cake

100 Layer Cake features a post for the artsy types, and it's pretty awesome!!! 
Love the dress!!! ("Aubrey," designed by Lindee Daniel of Lovely Bride)

That bouquet is amazing! (Floral done by Charlie and Olivia)

I love that the ceremony site seems really intimate and charming!